


How to Regrout Tiles?
Are you tired of cleaning your tiles? Are your tiles looking worn out? It's time to regrout your tiles! This method is effective to revamp your tiled room without having to change a single tile.
It is much easier to clean a tile rather than the grout around it. This is because the light coloured and porous grout mixture is highly susceptible to staining. Moreover, over time, it accumulates the remains of spills, mud, and dust, resulting in fungus and mould build-up. Thus, routine grouting of your tiled areas is essential to ensure spotless and hygienic conditions.
Material and Tools You Need
First, let us have a look at the materials and tools that will help make your regrouting project smoother and less time-consuming.
- Choice of grout (waterproof)
- Masking paper
- Bucket
- Utility knife
- Grout Saw or electric grout remover
- Bleach
- Mildew remover
- Sponge and cleaning supplies
- Household cleaner
- Grout float and trowel
- Vacuum
- Microfibre polish cloth
- Grout sealer
Before You Begin
Before regrouting and irrespective of the tools and material you are using, it is vital to wear protective gear, i.e. goggles, dusk masks, and rubber gloves. Next, you need to cover all the surrounding areas (such as the tub or the sink) with masking paper. If you are grouting near a drain, that also needs to be covered as it can affect the plumbing.
How to Regrout Tiles?
Here are the steps for a simple and cost-effective regrouting process :
- Selecting your new grout
Once you have decided to regrout your room, you can then go ahead and select the correct type of grout. The type of grout will depend on the areas to be redone and the colour you want.
In case you are grouting a small area, a ready-mixed tub is sufficient. However, the colours available in this grout are minimal. Hence, you can consider going in for powdered grout and in your desired pigment. From a utility perspective, grout with latex as an additive is recommended as it is water-resistant, making it ideal to use in moisture-rich areas.
In case you are regrouting only a tiny part of the room, the colour of the new grout should match the earlier grout. However, if you have decided to revamp your room, you can choose from various colour options. You can either match the colour of the tile or use a contrasting colour for breathing life into the room.
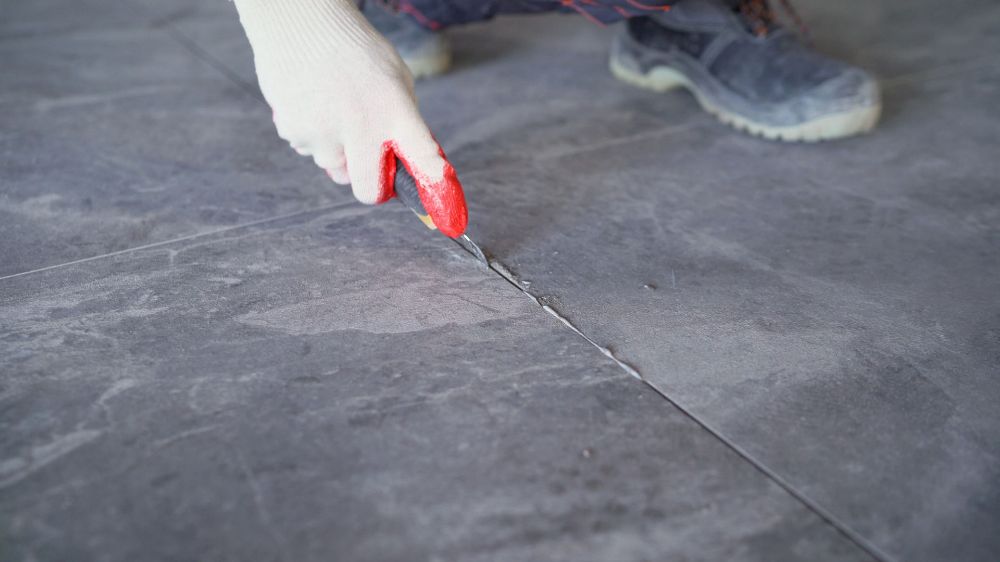
- Remove the Old Grout
(Pro Tip: If the tiled area is dry, lightly spray water over the grout joints before proceeding)
For the process, you can either use a utility knife, grout saw, or a pulsating tool for grout removal between tile joints. The former can be used for small tiled areas, while the latter is helpful in cases of hardened grout as it consists of chips of the diamond blade. Both methods are time-consuming, and it is crucial to be mindful not to chip the tile.
Remember to pause at regular intervals and clear out the dust and residue with a vacuum cleaner. Once done, clean the area with bleach and mildew remover. Lastly, with a damp sponge, wipe down the area with a household cleaner or mixture of water and cleaning detergent.
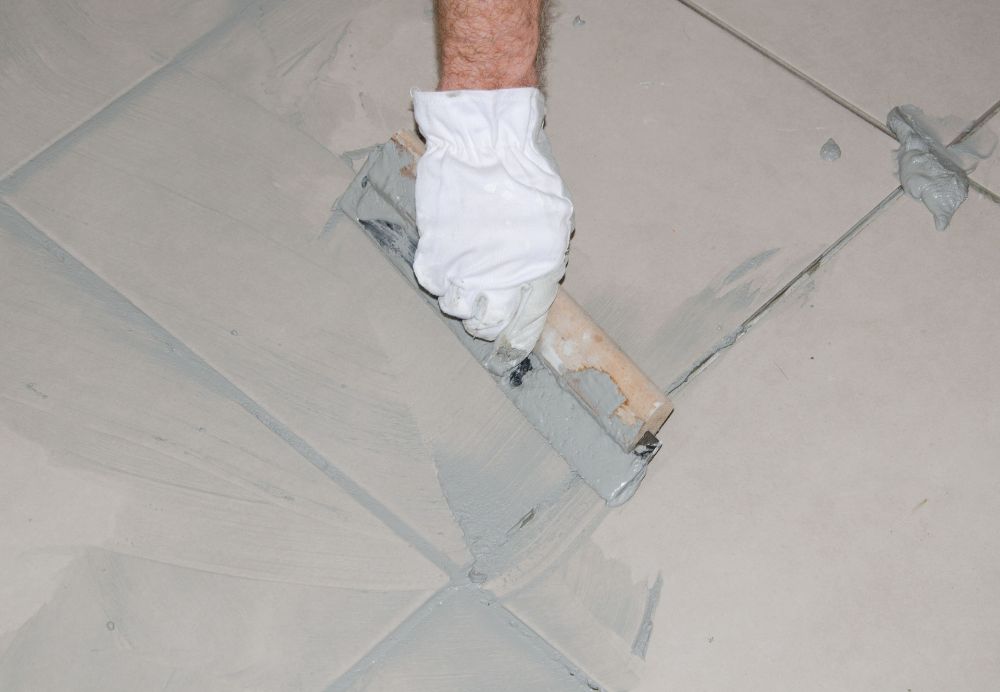
- Grouting
Before you commence the grouting process, ensure that the grout lines are completely clean and dry before replenishing them with fresh grout. Next, if you are using powdered grout, transfer the required amount to a bucket, slowly add water and mix with a trowel until you arrive at the right consistency. Let it rest for a short while but do not let it become hard.
(Pro Tip: If you are new to grouting, mix and apply in small batches to ensure that the mixture doesn't harden before the application)
In case you are using pre-mixed grout, you can skip this step and start applying it directly. Using a float, the grout needs to be applied and then spread diagonally. Holding the float at a 45-degree angle and going over all the joints at least three times will ensure even coverage. Finally, get rid of the extra grout by placing it at a 90-degree angle. Then, you can move it over the tile.

Cleaning and Finishing
Once the grout is set, you can use a damp tile sponge to remove the tile's grout residue, followed by a dry cloth. The tiles will feel and look a little hazy. Depending on the grout and area of the room, the grout will take 24 to 48 hours to cure. You can then buff the tiles with a polish cloth. Last, to ensure that your grout stays intact for many years, you can apply a silicone sealer to protect it.
(Pro Tip: If a grout sealer is spilt, the floor will become slippery. Hence, exercise caution while applying it and wipe spills immediately using a soapy detergent)
While time-to-time cleaning of grout is essential, regrouting your tiles gives your room a new lease of life.

