


How to Grout Tiles?
It is that time of the year again; you pull out your home maintenance checklist and tick off item-by-item. However, you have one item left on it – Tile Grouting.
Are you new to the process? Wondering how to grout? Don't be overwhelmed, it's not as tough as it sounds! This article throws some light on the simple procedure.
How to Clean Grout?
First, what is Grout? It is a dense mixture of water, cement, and sand used to fill the crevices between tile joints. Grouting is the finishing step in the tiling process with added benefits of waterproofing and sealing. Its household applications are filling in tiles in kitchen or shower areas.
Now, let us understand how to clean floor tile grout :
· For daily maintenance, one should use an alkaline tile cleaner with micro ban antimicrobials to remove grout. It is quick and efficient in clearing grease and stains from tiles, and its regular use keeps grouted surfaces hygienic, clean and free from mould and fungus.
· For annual deep-cleaning, a tile grout cleaner needs to be applied directly onto the grout, left for a few seconds and then scrubbed with a coarse sponge. Remember to apply mild pressure to avoid any damage to the tiles. Post this, rinse with clean water and repeat if required. Once dried, apply a grout protector spray to preserve tiles and ensure an effortless cleaning process thereafter.
Despite the cleaning frequency, it is essential to read the package instructions thoroughly on how to remove the grout and for its tile suitability.
How to Grout Floor Tiles?
Post tiling, these are broadly the 4 steps followed in grouting:
Pre-grout
Before commencing, it is important to inspect, clean and prepare your tiles. Here are a few tips:
· Maintain debris and dust-free areas
· Test the grout on a tile patch for discolouration or removal issues
· Check adhesive’s drying time and remove the excess before grouting
· Keep climatic conditions in check as it may affect setting time; hence small batches are advised
Mixing the grout
Next, add the powder to a bucket of water and mix to ensure a lump-free consistency. In case of any additive, ensure it is added before the grout powder and mix thoroughly. Importantly, ensure water quantity is added based on instructions – add too much, and the mixture will harden. Further, avoid over mixing at all times to prevent air from getting trapped in it. The mixture takes around 2-3 minutes to set, post which an additional mix for 30 seconds is advised.
Application of the mixture
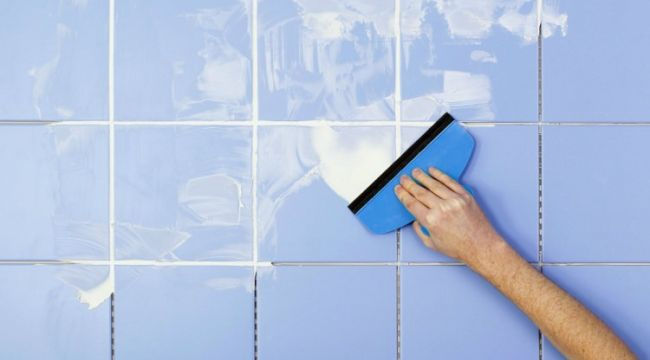
With all the tools by your side, you can now start the application. Using a grout float, apply and smoothen the grout on the tiles. For best results and complete coverage, hold the float at a 45° angle, and apply diagonal strokes. Further, always ensure diligent removal of excess grout.
The area should dry in 15 minutes and can be checked by doing a touch-dry test. Post this; the surface needs to be mildly wiped with a clean wet sponge in a diagonal motion. Then leave it to dry for another 60 minutes and wipe with a microfibre towel to give a polished finish. The tiles will then be covered in a slight haze.
Now, how long does grout take to dry? The curing time of the grouted areas depends on the type of grout used and room dimensions. The general rule of thumb would be 24 hours for a dry area and up to 2 weeks for a wetter surface.
De-hazing and finishing
At times, there are polymer remnants once you apply and clean grout in floor tiles. Hence, for a smooth finish, the tiles require a washdown the following day, along with a clean-up done with a polish cloth. One should not avoid this step as the tiles will continue to look hazy if overlooked. For long-lasting grout, one can spray the tiles with a grout protector and allow them to dry for 4-8 hours.
Grouting Materials & Tools
Now that you have got a bird’s eye view on how to grout tile, let us look into the material used and the tools employed.
Types of grouts:
Cementitious Grouts:
· Consists of cement, pigments, fillers and additives for water retention
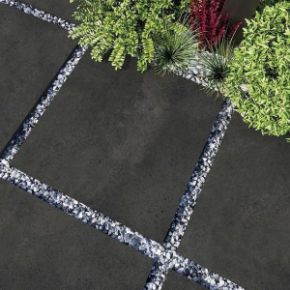
· Mainly used for outdoor applications
· Two types – sanded (grainy and used for larger areas) and unsanded grouts (smooth and used for smaller areas)
Epoxy Grout:
· Consists of epoxy resin, pigments, silica fillers, pigments, and a hardening agent
· Best used in kitchens and bathrooms since it is less porous.
Furan Resin Grout:
· Consists of polymer blend and fortified alcohols
· Best used in institutional kitchens and breweries due to its chemical resistance.
Tool List:
· Float and trowel
· Sponge
· Clean mixing bucket
· Microfibre towel
· Mixing paddle
· Suitable Tile Polishing Cloth
· First Wash liquid
· Wash Kit (including grout clean up pads)
· Protective equipment – gloves and goggles
Grouting provides a dual benefit of seamless tile appearance and protection of tiles & underlying surfaces. Once well equipped with materials and tools, follow the step-by-step process provided above on how to grout tiles. Just follow our instructions, and you will be able to grout at a professional standard in no time!


